Who am I?

and, who’s In Control?

‘In front of the lens I am at the same time: the one I think I am, the one I want others to think I am, the one the photographer thinks I am and the one he makes use of to exhibit his art’ (Barthes, 1980, p.13)
Viviane Sassen (2016)

This introductory session aims for participants to explore the nature of (shared) control inherent in all portraiture and the tension between photographer, sitter, the viewer who ‘interprets’ it and the context within which it is seen. In this context, it also encourages participants to reflect on a series of portraits, and also make comparisons between painted and photographic representations of ‘self’.

It poses the question ‘In what sense can a literal image express the inner world and being of an individual before the camera?’ (Clarke, 1997, p.101)

‘A face is a mask, is a lie. The face acts as a permeable membrane, a negotiated zone between the subject and the object, outside and in’ (kennedy 2006)

this session could be run in conjunction with:

‘Portraits are representations, not documents’ (West, 1997, p.53)
Albert Sands Southworth & Josiah Johnson Hawes (1850) Young Girl with Portrait of George Washington

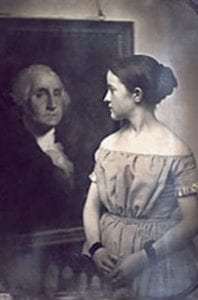
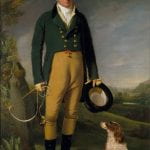
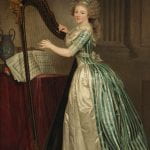
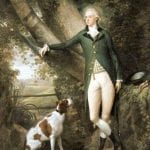
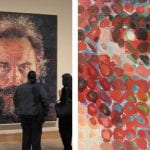
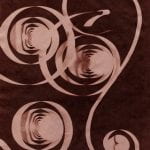
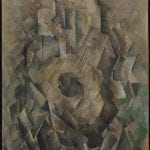
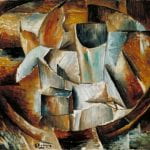
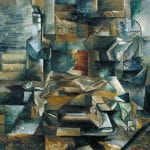
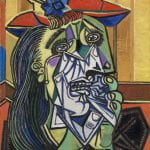
Compare: The painting and the photograph. Which do we consider the more ‘truthful’? Which subject is given the most prominence? Why?

‘The subject framing eye of the photographer is difficult to reconcile with the objectivity of the camera’s technology, it’s seemingly transparent realism of recording’ (Hutcheon, 2003, p.117)


Aims & Outcomes:

  • For participants to consider the different ways in which a self might be represented.
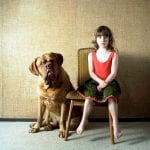
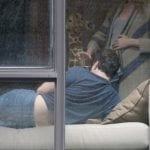
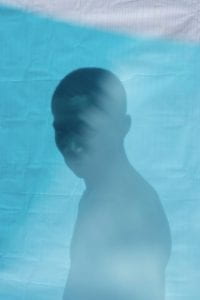
  • To consider the percieved ‘truth’ of the portrait, as an interaction between photographer, sitter and audience Who’s view is it? Is it the photographers view? Is it an ideal self? Is it a collaboration? How is it ‘read’ by its audience? What happens when we don’t know we are bring watched?
  • Participant Outcome: Produce 3 10 x 8 portraits. (where the photographer is in control / the sitter is in control / a collaboration between photographer and sitter)
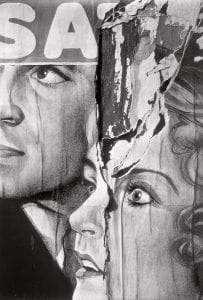
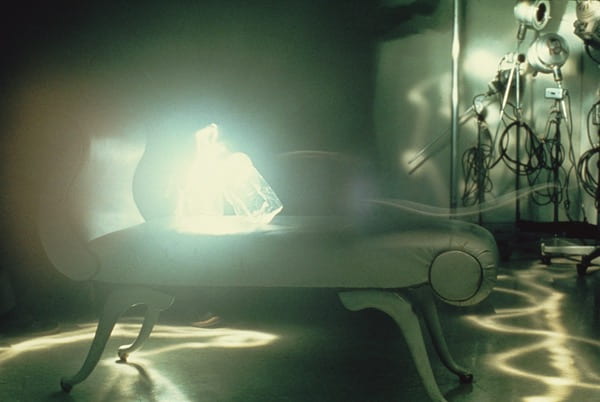
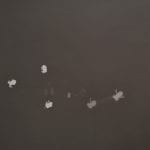
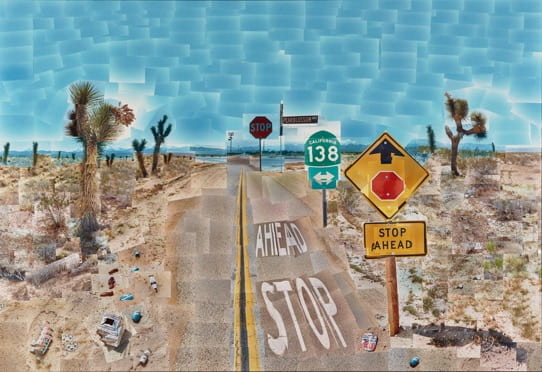
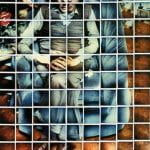
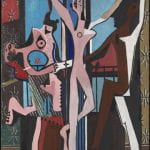
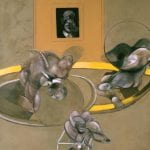
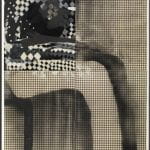
Walker Evans (1931) Torn Movie Poster

Think About: A percieved innocence / transparency of photographic portraits. Why might we find this image ‘grotesque’?

The grotesque effect of the photograph of the movie poster depends on the equivalence of object and its representation, of woman and picture-woman, that photography allows (Savedoff, 2000, p.51)


You will need:

  • Digital cameras for all participants (and appropriate memory cards)
  • Card readers
  • Access to computers (or laptops)
  • Flashguns (or a Studio) to practice lighting techniques
  • Any props / costumes you might need
  • Ideas about locations to photograph in (and how this will influence the image)
  • An Introductory brief & Presentation (below) for participants to outline the ideas and provide examples
  • A booked room to critique participants work (either via a projector or via print)
  • Blue tack to pin the work
  • Costings and Risk Assessments
‘Sometimes I think all my pictures are just pictures of me. My concern is the human predicament; only what I consider the human predicament may simply be my own’ (Avedon in Kozloff, 2011)
Felix Nadar (c.1855) Charles Baudelaire
Etienne Carjat (c.1860) Charles Baudelaire

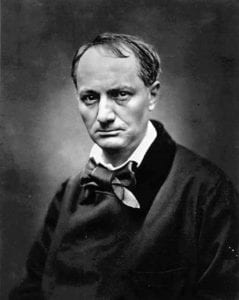
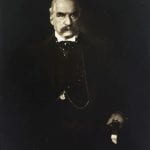
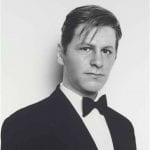
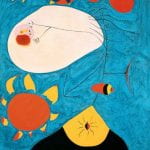
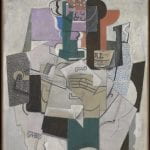
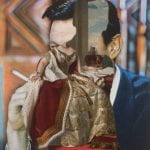
Compare: These different visions of Charles Baudelaire. Can photographers ‘create’ different selves and transform the sitter into someone else? How do we ‘read’ each image?

‘Once I feel myself observed by the lens, everything changes; I constitute myself in the process of ‘posing’, I instantaneously make another body for myself, I transform myself in advance into an image’ (Barthes, 1980, p.10)
Andre Adolphe-Eugene Disderi (c.1862) Carte de Visite

Think About: Performing for the camera. How and why do sitters perform? Do we always want an ‘idealised’ image?

‘Many people are anxious when they’re about to be photographed; not because they fear as primitives do, being violated, but because they fear the cameras disapproval – people want the idealised image’ (Sontag, 1977, p.85)


preparation work:

  • Ask participants to read Richard Dorment (2003) ‘Photography in Focus: Thomas Ruff’ in The Telegraph 29th May 2003 available here
  • Ask participants to explore the National Portrait Gallery resources and select one feature / practitioner of thier choice to further research available here
  • Ask participants to watch Sandy Nairne (2019) Judging the BP Portrait Award and select / consider images they respond to (or not) available here
  • Ask participants to identify and bring a selection of props they might need, as well as identify locations for photographing
  • Ask participants if they have thier own digital cameras and cards
  • Make sure you have access to computers
  • Make sure there are enough team members to support participants (never assume thier prior knowledge)
  • Decide whether you will project the work or print it.
  • Decide whether you will introduce location / studio lighting
  • If you are printing it make sure the Photo Lab are aware and be aware of timekeeping so they have space to print the work.
  • *If you are running this session off campus, make sure there is access to printers or projectors
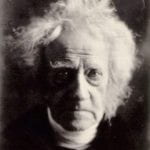
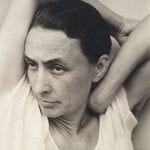
‘When I have had such men before my camera my whole soul has endeavored to do its duty towards them in recording faithfully the greatness of the inner as well as the features of the outer man’ (Cameron in Raymond, 2017, p.34)
Thomas Ruff (c.2000) from Portraits

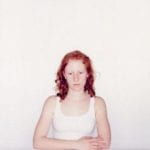
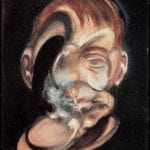
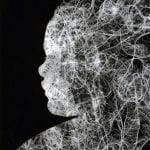
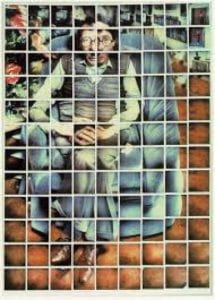
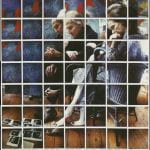
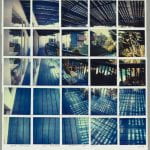
Think about: The control / vision of the photographer / the interpretation of the viewer. What does Ruff’s work really tell us about the sitter?

’Photography can only reproduce the surface of things. The same applies to a portrait. I take photos of people the same way I would take photos of a plaster bust. What people see, eventually, is only what’s already inside them’ (Ruff in Dorment, 2003)


suggested Session Outline:

Arnold Newman (1963) Alfred Krupp

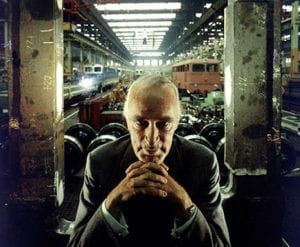
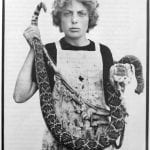
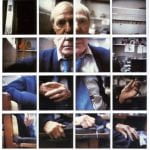
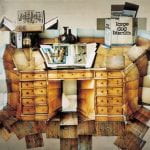
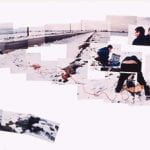
With this image in mind, ask participants to watch Arnold Newman talks about taking Alfred Krupp Portrait (2011) available here

Think about: How and why Arnold Newman has constructed this portrait the way he has / How Alfred Krupp might have wished to be represented / How we respond to it as viewers / How are public figures / celebrities represented?


  • Ask participants to consider the nature of the portrait. How do they make them? Is there a difference when they are photographed as sitters? How do we ‘read’ portraits as viewers?
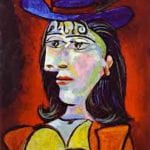
  • What is the difference between a painted portrait and a photographed one?
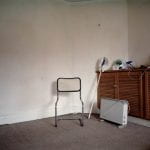
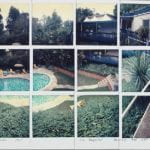
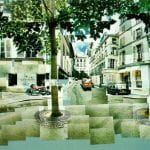
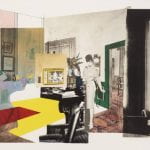
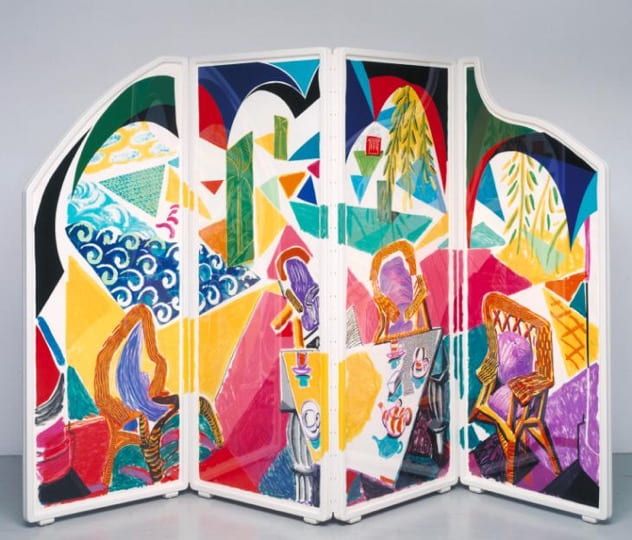
  • Give the Presentation below. Invite participants to compare the approaches? Who is in control? Are self portraits different? Do we all ‘perform’ in similar ways? Are photographs of celebrities merely collaborative stereotypes? Can a ‘space’ be a portrait?
  • In pairs make 3 portraits:
    • Take Control: The photographer has complete control over the representation of the sitter. ‘Who’ are they (percieved as)?
    • Ideal Selves: The sitter has complete control over thier own representation of the sitter. ‘Who’ are they (trying to be)?
    • Working Together: Photographer and sitter collaborate on the representation. What’s the difference?
  • Print / Project and critique the images with these intents / aesthetics / the tensions between photographer / sitter / viewer in mind. Are they viewed in the way that photographer / sitter intended?
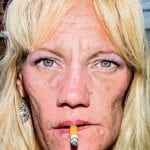
‘There’s a point between what you want people to know about you and what you cant help people knowing about you. And that has to do with what I’ve always called the gap between intention and effect’ (Arbus in Goldman, 1974, p.32)
Gillian Wearing (1992) from Signs

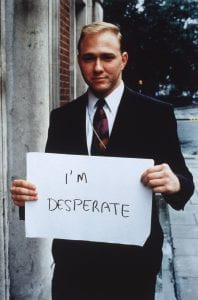
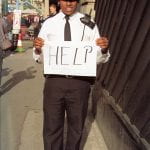
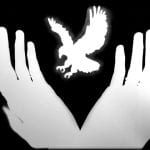
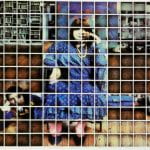
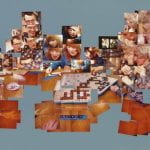
Think About: Collaborative portraits. How does Wearing’s work Say What You Want Them To Say and Not Signs that Say What Someone Else Wants You To Say (1992-1993) encourage us to consider the nature of the portrait?

‘[This collaboration] interrupts the logic of photo-documentary and snapshot photography by the subjects’ clear collusion and engineering of their own representation.’ (Wearing, 1997, p.3)


Presentation ideas: whO Am i? who’s In Control?

Photo + Graphy = Light + Writing

/fəʊtəˌGrɑːf/: drawing with light

Sir John Herschel phrased the term ‘photo-graphy’ in 1839 in his Royal Society paper on photography (1839),  it is based on the Greek φῶς (phos), meaning ‘light’ and γραφή (graphê), meaning ‘drawing / writing’ – together meaning ‘drawing with light’ (in Schaaf, 2013)
Pablo Picasso / Gjon Mili (1949) from Light Drawings


In this session participants will produce images using light painting techniques / artifical light sources in order to explore the idea of the constructed image, the dependence of the photographic process on light and time, as well as further consolidating learning of photographic exposure / shutter speeds and the representation of time and motion


‘if I should ever seriously photograph, it would be…the flux of things. I wanted then, and still do, to express the ‘thing’ as part of total flow’ (Morgan in Morgan & margolis, 1980)

This Session could be run in conjunction with:

Barbara Morgan (1940) Pure Energy and Neurotic Man

Aims & Outcomes:

  • For participants to visually explore the nature of photographic seeing and constructing images using light
  • For participants to understand how exposure and shutter speeds can influence the image
  • Participant Take Away Outcome: At least 3 different light writing photographs
Matthew Murray (2012-2018) from Saddleworth

You will need:

  • Digital Camera with a manual exposure setting
  • Tripods
  • A darkened room / studio or shoot outside at dusk / night
  • A selection of movable light sources (e.g. torches, phones, glo-sticks, maglights, fairy lights, flashguns, bicycle lights etc) *if you are outside, car headlights can also illuminate a space
  • Shutter release (for self portraits etc)
  • Card readers
  • Access to computers (or laptops)
  • An introductory brief & Presentation (below) for participants to outline the ideas and provide examples
  • A booked room to critique participants work (either via a projector or via print)
  • Blue tack to pin the work
  • Costings and Risk Assessment
Man Ray (1935) Self Portrait from Space Writing


While the signature was of course apparent to [Man Ray], the photograph remained for many years an “abstract image” to others. The discovery of this inscription is both a revelation and a resolution. Now, seven decades after he made his own game of Hide-and-Seek, we can finally look back at Man Ray and say: “There you are!” (Carey, 2011)

preparation Work:

  • Plan at least 5 different approaches to drawing with light and make sure you have all materials. Think about;
    • Light Drawing: The light source can be seen by the camera, during a long exposure the artist uses this light source to draw, write or create a design within the frame
    • Kinetic Light Painting; The lights in the scene generally remain stationary while the camera itself is moved about during a long exposure to create color and design within the frame.
    • Light Painting; The artist uses handheld light sources to selectively illuminate parts of a scene during a long exposure photograph.
  • Ask participants to read A History of Light Painting Photography available here
  • Ask participants to think of and draw out some initial ideas for constructing images using light. There are a number of introductory videos to be found online but a good example for beginners is here
  • Ask participants if they have thier own digital cameras and cards
  • Make sure you have access to computers
  • Make sure there are enough team members to support participants (never assume thier prior knowledge)
  • Decide whether you will project the work or print it.
  • If you are printing it (6×4) make sure the Photo Lab are aware and be aware of timekeeping so they have space in the session to print the work.
  • *If you are running this session off campus, make sure there is access to a darkened room, printers or projectors
Dean Chamberlain (1977) Two Polyesthene Bags and a Chaiselonge
‘The viewer is instantly confronted with how frequently we take for granted the light in our everyday lives, not to mention its role in traditional photography. After all, how else would one make a photograph without at least a minimal amount of available light in the environment? One look at [Chamberlains] works and it becomes clear–there are other ways. While Chamberlain paints with light through time and space, the light itself becomes the primary subject matter, shifting the focus from the subject/object to the very element through which the work (and our lives) are revealed’ (Meta Gallery, Toronto, 2008)

presentation ideas: drawing with light

‘Light used in its own right, as in light pictures, gives to photography the wonderful plasticity that paint gives to painting without loss of the unmatched reality of straight photography’ Wynn Bullock (in bullock Family 2019)

lightwriting: activity ideas

You might:
  • Draw a picture
  • Outline a person / object
  • Spin some fairy lights to create an orb
  • Do a double exposure
  • Use flash / torches to light certain aspects of an internal / external scene
  • Write a message / your name
  • Use glo-sticks to create abstractions
  • Use movement (either object or camera) to create abstractions

Suggested Session Outline:


Sculpted by Light

The Light (and Delight) of the Photogram

‘I am doing Photograms! I am having such fun. They reveal the most beautiful new world of light & form’ (Hepworth in Bowness, 2013)
Barbara Hepworth (1932-33) Self Portrait Photogram


This is a fun session in which participants will make photograms, as well as learn the basics of analogue processes. It also serves as an introduction to the constructed image, the dependence of the photographic process on light and time, as well as basic darkroom development principles.


‘A photogram is not a photograph, not really. Sure, it is usually discussed as a subset of photography, and it was born around the same time, from similar chemistry, but is practically and conceptually only remotely related. A photogram is a 1:1 scale negative record of a shadow. It is unique and unpredictable. Photographs tell sweeping, barefaced lies; photograms tell the truth, but only a thin slice of it. the ocean of images that surges and swells around us is mainly photographic; we are awash with manipulated half-truths and shameless fictions’ (Griffin, 2019)

This Session could be run in conjunction with:

Lloyd Godman (1993-94) from Evidence from the Religion of Technology
‘An automatic reproduction by the action of light’ (Niepce (1839) in Trachtenberg, 1980, p.5)
‘It is not an instrument which serves to draw nature but a chemical and physical process which gives her the power to reproduce herself’ (Daguerre (1839) in Trachtenberg, 1980, p.13)
‘By optical and chemical means alone [the image is] impressed by Nature’s hand’ (Talbot (1839) in Wood, 2001, p.192)

Aims & Outcomes:

  • For participants to discuss and visually explore the nature of photographic seeing
  • For participants to experience and understand the nature of darkroom processing
  • Participant Take Away Outcome: At least 3 photograms
Dan Peyton (2015) Forsythia Elegy

You will need:

  • A selection of small objects / materials to make photograms with (participants can also bring / find objects / materials)
  • 10 x 8 inch Ilford Multigrade Paper
  • A Darkroom / Darkroom chemicals
  • *if you are working off-campus you will need a light tight room, chemicals, trays and red lights
  • An introductory brief & Presentation (below) for participants to outline the ideas and provide examples
  • A booked room to critique participants work
  • Blue tack to pin the work
  • * Access to Photocopiers with a scan function / Scanners, Printers etc if you are planning on making digital photograms
  • Costings and Risk Assessments
‘Photography can lie as to the meaning of a thing but never to its existence’ (Barthes, 1980, p.89)
Jochen Lempert (2010) Glow-worm

presentation ideas: The Light (and Delight) of the photogram

Preparation Work:

  • Make sure you have all of the required materials (including some objects)
  • Make sure you have booked the darkrooms if you are working on campus / have chemicals, lights, trays etc if off campus.
  • Set up the enlargers (with carriers / lenses) and easels (9×6) in advance of the session
  • Introduce participants / teachers to darkroom processes / photograms by asking them to watch ‘Making a Photogram’ (2017) for Ilford available here
  • If you are working with Secondary School / College participants to read Jonathan Griffin (2019) ‘Out of the Light / Into the Shadow’ for Tate available here
  • If you are working with Primary School participants you could ask them to make a montage with some / the objects you have chosen on A4 paper and draw or photograph it. In the sesison / in advance, younger children can also cut out shapes and images from magazines (and mount onto card) as ‘objects’ to make storytelling photograms with.
  • You might encourage participants to make digital photograms using a photocopier / scanner. Some useful ideas are available here
‘For the first time an image of the world is formed automatically without the creative intervention of man. The personality of the photographer enters into proceedings only in his selection of the object to be photographed and by way of the purpose he has in mind. Although the final result may reflect something of his personality, this does not play the same role as that of the painter’ (Bazin (1967) in Trachtenberg, 1980, p.241)

Constructing Photograms: objects & Visual ideas

Suggested Session Outline:

The Seen is the Sum of its parts

Fragmented Scenes

‘If you don’t mind looking at the world from the point of view of a paralyzed Cyclops – for a split second. But that’s not what it’s like to live in the world’ (Hockney in Weschler, 2013)
David Hockney (1982) Kasmin, Los Angeles (12th March, 1982)


This is an adaptable session which aims to introduce participants to the construction of abstract / alternative scenes and spaces using simple joiner techniques. It encourages in-depth independent research into David Hockney’s practice and its positioning within wider ideas regarding the nature of photographic representation. It encourages participants to consider issues of perspective, scale, point of view, time and motion.


‘I never thought the world looked like photographs, really. A lot of people think it does but it’s just one little way of seeing it’ (Hockney in Jones, 2004)

This Session could be run in conjunction with:

David Hockney (1986) Pearblossom Highway (11th – 18th April, 1986)

Aims & Outcomes:

  • For participants to explore the construction of meaning in fragmented photographic representations.
  • For participants to consider time, perspective, scale, point of view, composition and juxtapositions in the construction of photographic joiners.
  • For participants to conduct in depth research on the work of David Hockney, his Cubist influences and apply these ideas to thier photographic practice.
  • Participant Outcome: 1 final 12×16 digital print

Research: the work of david hockney

‘When is the present? When did the past end and the present occur, and when does the future start? Ordinary photography has one way of seeing only, which is fixed, as if there is kind of an objective reality, which simply cannot be. Picasso…knew that every time you look there’s something different. There is so much there but we´re not seeing it, that’s the problem’ (Hockney in Joyce, 1998, p.31)

You will Need:

  • Digital cameras for all participants (and appropriate memory cards) *This session can also be run using Camera phones or Lumix cameras
  • Card readers
  • Access to computers (or laptops) and Photoshop / image editing software to make joiners
  • Cardboard 6×4 ‘viewfinders’ (or ask participants to make them)
  • An introductory brief & Presentation (above) for participants to outline the ideas and provide examples
  • A booked room to critique participants work (either via a projector or via print)
  • Blue tack to pin the work
  • Costings and Risk Assessments
  • Investigate the Tate resources for All About Cubism available here
  • Make sure you are confident making joiners in Photoshop

preparation work:

  • Ask participants to read Jonathan Jones (2004) ‘Disposable Cameras’ in The Guardian, 4th March 2004 available here
  • Ask participants to read Martin Gayford (2012) ‘Inverview with David Hockney in The Telegraph, 14th February 2012 available here
  • Ask participants to independently research the work of David Hockney 
  • Ask participants to watch the video David Hockney on What’s Unphotographable (2007) with Robert Hughes available here
  • Ask participants if they have thier own digital cameras and cards
  • Decide whether or not you wish participants to work in pairs / small groups to make thier joiners
  • Make sure you have access to computers / image editing software
  • Make sure there are enough team members to support participants (never assume thier prior knowledge)
  • Decide whether you will project the work or print it.
  • If you are printing it (12×16 per joiner) make sure the Photo Lab are aware and be aware of timekeeping so they have space to print the work.
  • *If you are running this session off campus, make sure there is access to printers or projectors
David Hockney (1987) Caribbean Tea Time

suggested session outline: