Sculpted by Light

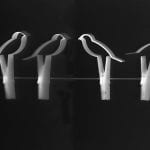
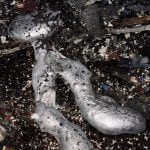
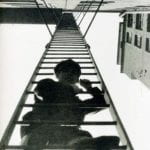
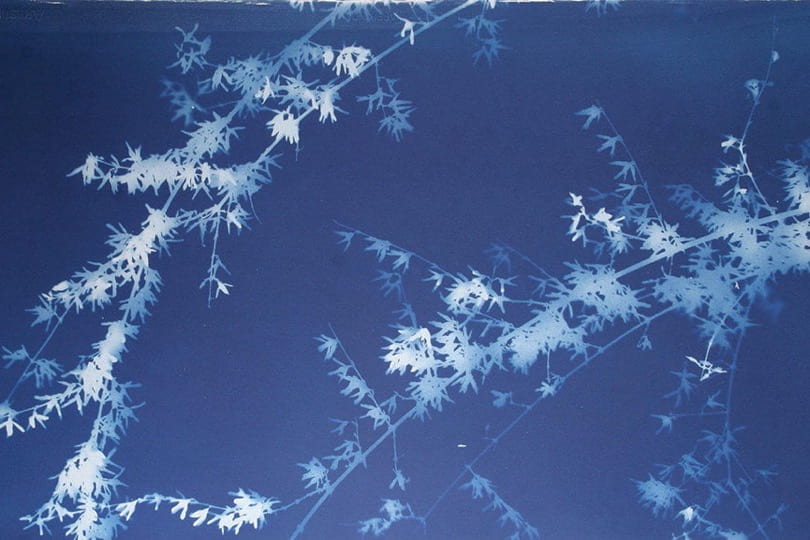
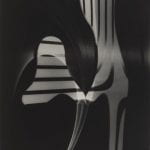
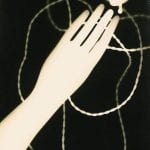
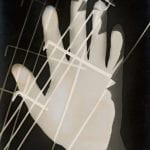
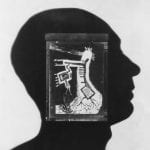
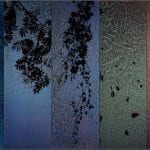
The Light (and Delight) of the Photogram

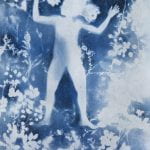
‘I am doing Photograms! I am having such fun. They reveal the most beautiful new world of light & form’ (Hepworth in Bowness, 2013)
Barbara Hepworth (1932-33) Self Portrait Photogram


This is a fun session in which participants will make photograms, as well as learn the basics of analogue processes. It also serves as an introduction to the constructed image, the dependence of the photographic process on light and time, as well as basic darkroom development principles.


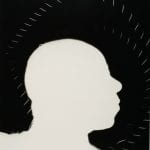
‘A photogram is not a photograph, not really. Sure, it is usually discussed as a subset of photography, and it was born around the same time, from similar chemistry, but is practically and conceptually only remotely related. A photogram is a 1:1 scale negative record of a shadow. It is unique and unpredictable. Photographs tell sweeping, barefaced lies; photograms tell the truth, but only a thin slice of it. the ocean of images that surges and swells around us is mainly photographic; we are awash with manipulated half-truths and shameless fictions’ (Griffin, 2019)

This Session could be run in conjunction with:

Lloyd Godman (1993-94) from Evidence from the Religion of Technology
‘An automatic reproduction by the action of light’ (Niepce (1839) in Trachtenberg, 1980, p.5)
‘It is not an instrument which serves to draw nature but a chemical and physical process which gives her the power to reproduce herself’ (Daguerre (1839) in Trachtenberg, 1980, p.13)
‘By optical and chemical means alone [the image is] impressed by Nature’s hand’ (Talbot (1839) in Wood, 2001, p.192)

Aims & Outcomes:

  • For participants to discuss and visually explore the nature of photographic seeing
  • For participants to experience and understand the nature of darkroom processing
  • Participant Take Away Outcome: At least 3 photograms
Dan Peyton (2015) Forsythia Elegy

You will need:

  • A selection of small objects / materials to make photograms with (participants can also bring / find objects / materials)
  • 10 x 8 inch Ilford Multigrade Paper
  • A Darkroom / Darkroom chemicals
  • *if you are working off-campus you will need a light tight room, chemicals, trays and red lights
  • An introductory brief & Presentation (below) for participants to outline the ideas and provide examples
  • A booked room to critique participants work
  • Blue tack to pin the work
  • * Access to Photocopiers with a scan function / Scanners, Printers etc if you are planning on making digital photograms
  • Costings and Risk Assessments
‘Photography can lie as to the meaning of a thing but never to its existence’ (Barthes, 1980, p.89)
Jochen Lempert (2010) Glow-worm

presentation ideas: The Light (and Delight) of the photogram

Preparation Work:

  • Make sure you have all of the required materials (including some objects)
  • Make sure you have booked the darkrooms if you are working on campus / have chemicals, lights, trays etc if off campus.
  • Set up the enlargers (with carriers / lenses) and easels (9×6) in advance of the session
  • Introduce participants / teachers to darkroom processes / photograms by asking them to watch ‘Making a Photogram’ (2017) for Ilford available here
  • If you are working with Secondary School / College participants to read Jonathan Griffin (2019) ‘Out of the Light / Into the Shadow’ for Tate available here
  • If you are working with Primary School participants you could ask them to make a montage with some / the objects you have chosen on A4 paper and draw or photograph it. In the sesison / in advance, younger children can also cut out shapes and images from magazines (and mount onto card) as ‘objects’ to make storytelling photograms with.
  • You might encourage participants to make digital photograms using a photocopier / scanner. Some useful ideas are available here
‘For the first time an image of the world is formed automatically without the creative intervention of man. The personality of the photographer enters into proceedings only in his selection of the object to be photographed and by way of the purpose he has in mind. Although the final result may reflect something of his personality, this does not play the same role as that of the painter’ (Bazin (1967) in Trachtenberg, 1980, p.241)

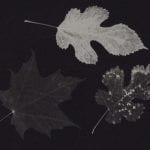
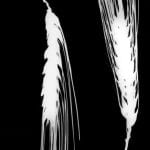
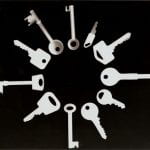
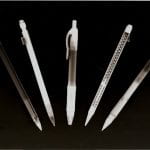
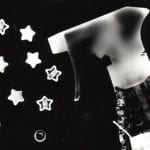
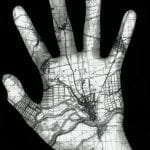
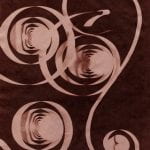
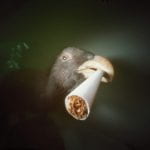
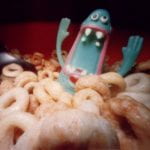
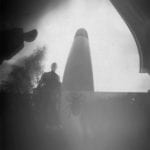
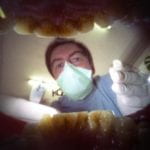
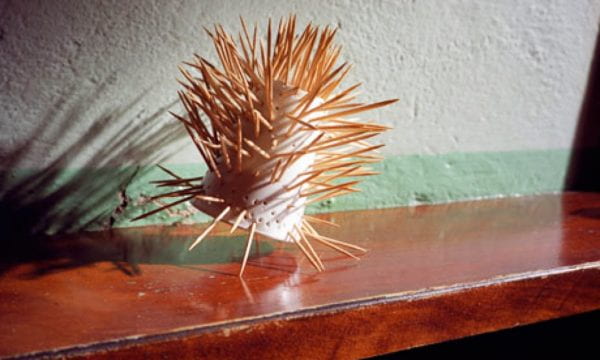
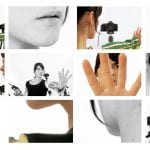
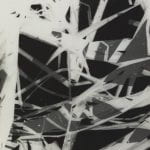
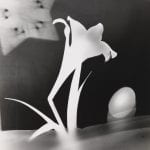
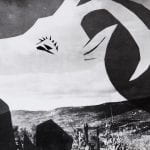
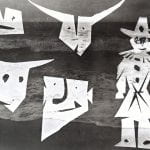
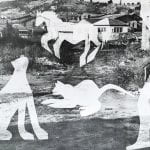
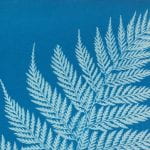
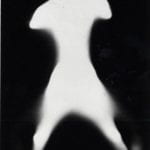
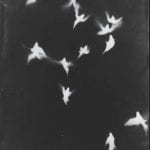
Constructing Photograms: objects & Visual ideas

Suggested Session Outline:

Down the Rabbit (Pin)Hole

Looking Through The Pinhole

Gina Glover (2010) from Liminal World

This is a fun session in which participants will make thier own pinhole cameras to take away, as well as learn the basics of pinhole photography. It also serves as an introduction to apertures, shutterspeeds and basic darkroom development principles.

This Session could be run in conjunction with:

Aims & Outcomes:

  • For participants to discuss and visually explore the nature of seeing like a camera
  • For participants to conduct in depth research on the work of Justin Quinnell and apply these ideas to thier practice.
  • For participants to expereince the nature of darkroom processing
  • For participants to understand how to scan and inverse images using Photoshop
  • Participant Take Away Outcome: A pinhole camera and least 4 pinhole photographs

Research: The work of Justin Quinnell:

You will need:

  • 1 x 500ml Aluminium can per participant
  • A Can Opener
  • Black Duct Tape
  • Black Card
  • Black insulation / Electricians Tape
  • Scissors
  • Pins
  • 5 x 7 inch Ilford Multigrade Paper
  • A Darkroom / Darkroom chemicals
  • *if you are working off-campus you will need a light tight room, chemicals, trays and red lights
  • An introductory brief & Presentation (below) for participants to outline the ideas and provide examples
  • A booked room to critique participants work
  • Blue tack to pin the work
  • * Access to Scanners, Printers etc if you are planning on inversing and printing the work
  • Costings and Risk Assessments

presentation ideas: Down the Rabbit (pin)hole:

Preparation Work:

  • Make sure you have all of the required materials.
  • Make sure you have booked the darkrooms if you are working on campus.
  • Have some 5×7 Pinhole work ready in a box to demonstrate development
  • If you are printing digitally in the Photo Lab – make sure they know when these images will be sent and when you need them back by.

Suggested Session Outline:

  • Ask participants what they think the characteristics of photography are. (e.g. light, time, fixed, reproduction) Are these specific to certain ‘types’ of photograph? Is the word ‘photographies’ more appropriate?
  • Deliver presentation / brief and encourage discussion and debate
  • Show Pinhole camera
  • In small groups – make Pinhole Camera
  • Break
  • Have some 5×7 Pinhole sheets ready to demonstrate development
  • Darkroom Induction
  • Explore Pinhole cameras / develop
  • *Scan and inverse Pinhole work into positives. Print analogue or digital.
  • Critique and give feedback with the group

What is a Photograph?

John Szarkowski & the Characteristics of the Photograph

‘This book is an investigation of what photographs look like, and why they look that way’ (Szarkowski, 1966, p.6).
John Szarkowski (1966) The Photographers Eye, New York: Museum of Modern Art

John Szarkowski was the Director of Photography at the Museum of Modern Art (MOMA) in New York from 1962 – 1991. In 1966 he produced a book called The Photographers Eye in which he attempted to identify and specifically define the characteristics by which the photograph transforms the world in front of the lens. It was based on the 1964 MOMA exhibition of the same name, and placed great emphasis on the photographer’s process of selection from the real world. The Introduction to The Photographers Eye (1966) can be accessed here


related POSTS:

The 5 characteristics of photography for John Szarkowski (1966) were:

  • The Thing Itself
  • The Detail
  • The Frame
  • Time
  • Vantage Point
The Thing Itself: ‘The first thing that the photographer learned was that photography dealt with the actual; he had not only to accept this fact, but to treasure it; unless he did, photography would defeat him’ (Szarkowski, 1966, p.8)
The Thing Itself: Unknown (c.1850) Couple with Daguerrotype in Szarkowski (1966) The Photographer’s Eye
The Detail: ‘The photographer was tied to the facts of things, and it was his problem to force the facts to tell the truth’ (Szarkowski, 1966, p.8)
The Detail: Peter Fraser (2005) Untitled
The Frame: ‘Since the photographer’s picture was not conceived but selected, his subject was never truly discrete, never wholly self-contained. The edges of his film demarcated what he thought most important, but the subject he shot was something else, it had extended in 4 directions’ (Szarkowski, 1966, p.9)
The Frame: Guy Bourdin (1978) for Charles Jourdan
Time: ‘There is in fact no such thing as an instantaneous photograph. All photographs are time exposures of shorter or longer duration, and each describes a discrete parcel of time. This time is always the present’ (Szarkowski, 1966, p.10)
Time: Elliott Erwiit (1989) Paris, France from Dogs
Vantage Point: ‘Much has been said about the clarity of photography, but little has been said about its obscurity. And yet it is photography that has taught us to see from the unexpected vantage point’ (Szarkowski, 1966, p.10)
Vantage Point: Alexander Rodchenko (1925) Fire Escape
Aims & Outcomes:
  • For participants to discuss and visually explore Szarkowski’s 5 characteristics of the photograph
  • For participants to produce at least 3 10×8 analogue (edited) images which explore these 5 characteristics
  • Participant Take Away Outcome: At least 3 10×8 exhibition quality black and white photographs
You will need:
  • 35mm Cameras for all participants
  • lford HP5 35 film (24 exposure) for all participants
  • Ilford Multigrade Paper 10×8 size (Lustre)
  • An introductory presentation for participants to outline the ideas and provide examples
  • A booked room to critique participants work
  • Blue tack to pin the work
  • Costings and Risk Assessments
Preparation Work:
  • Ask participants to read The Introduction to The Photographers Eye (1966) which can be accessed here
  • Make sure you have booked the cameras and darkrooms from the Photography Stores
  • Make sure there are enough team members to support participants (never assume thier prior knowledge)
  • Set up the darkroom, enlargers and easels in advance.
Suggested Session Outline:
  • Ask participants what they think the characteristics of photography are. (e.g. light, time, fixed, reproduction) Are these specific to certain ‘types’ of photograph? Is the word ‘photographies’ more appropriate?
  • Deliver presentation / brief and encourage discussion and debate
  • 35mm camera Induction
  • In small groups investigate the local area and encourage visual exploration of each of Szarkowski’s 5 characteristics
  • Break (whilst the negatives are put through the film processor)
  • Darkroom Induction
  • Identify negatives to print
  • Black and White Printing session
  • Critique and give feedback with the group