This week saw me delve into the world of vendor UI design, a task which proved to have its own unique challenges. I also created a simple ‘level select’ screen to be accessed in the bathyspheres.
Shop menu
Within BioShock, vendors are an important interaction for the player as they allow them to purchase useful healing items, ammo, and weapon upgrades. As the player is often purchasing with a very limited currency, the design needs to be efficient and intuitive so that they have a good understanding of what they are spending their money on.
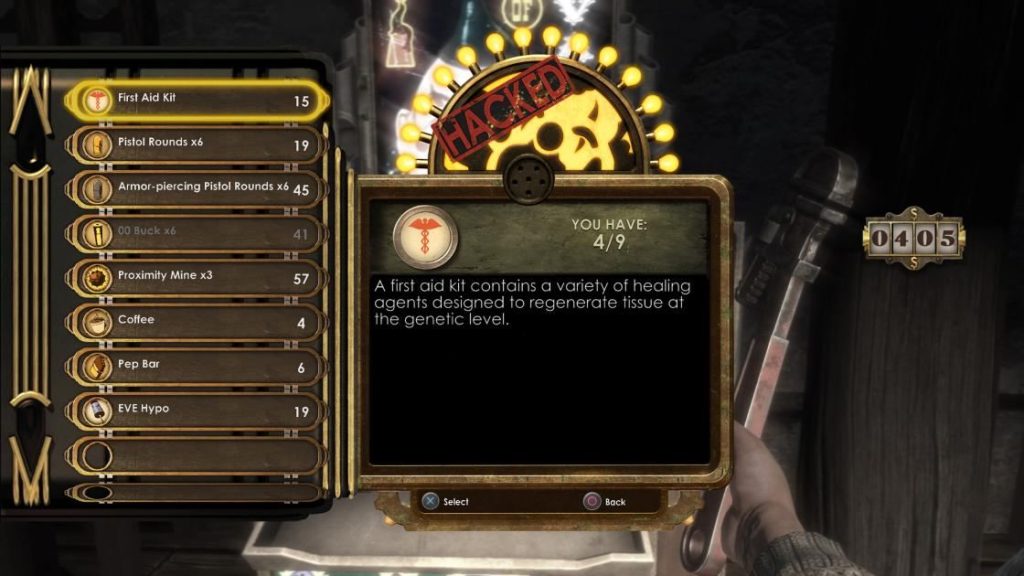
Looking at the design of the original’s vendor screens (fig. 1), I can see multiple areas for iteration. Item titles are not centred properly to their respective buttons. There is also a great deal of blank space to the right side of the screen, which could be better utilised. This is also where the currency count is located, the most pertinent information within this UI. As players read left-to-right and top-to-bottom, I feel a better location for this would be the top-left, where there is no risk of players missing it.
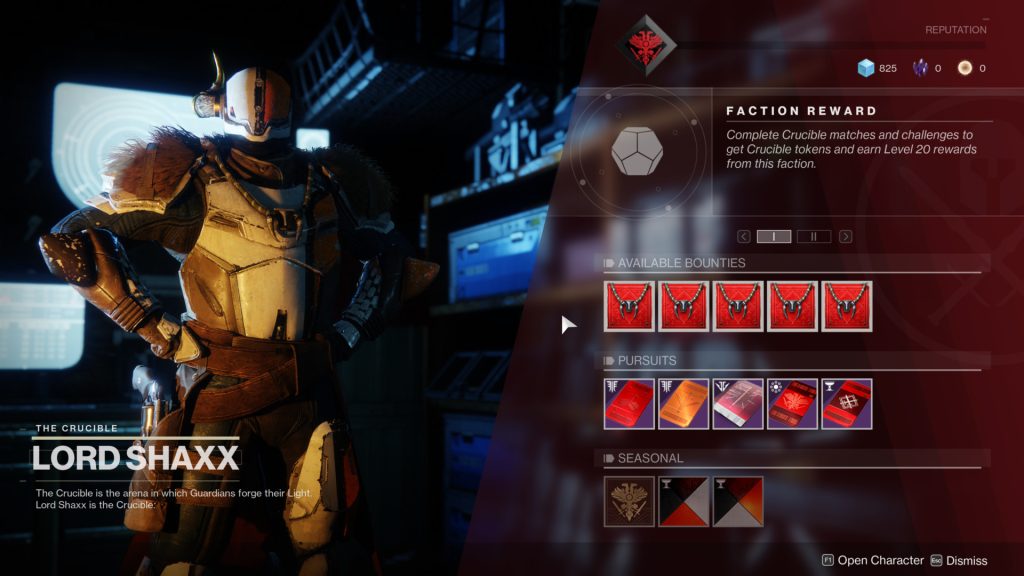
I took some time to research shop UI’s within more modern games to see if I could find current trends, or gleam any inspirations. The first I looked at was for Destiny 2 (2017), a game which has received a lot of deserved praise for its intuitive UI (fig. 2). The vendor UI uses grouping to organise elements pertaining to different systems, such as ‘faction rewards’, ‘miscellaneous’, and ‘daily bounty’. I like the horizontal arrangement of items in this context; it is much more instantly scannable and does not require the player to scroll to see all the elements they have access to.
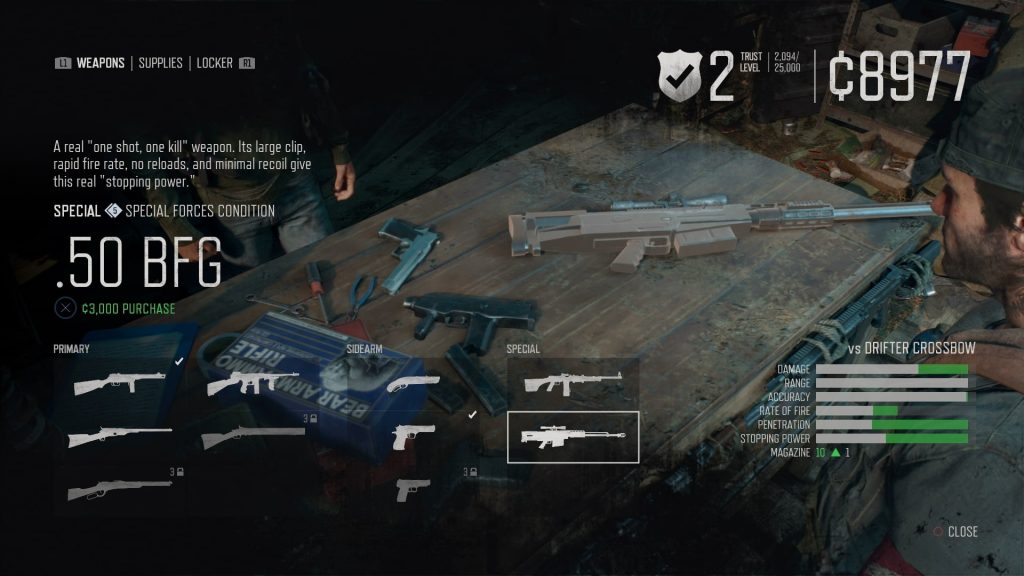
Days Gone (2019) shares some similarities in its vendor UI presentation (fig. 3). Horizontal grouping is used, with clean icons and large text denoting what each item is. Player currency is located at the top of the screen in a large font size that is very hard to miss. I like that the cost of each item is shown in a different colour, highlighting the important information.
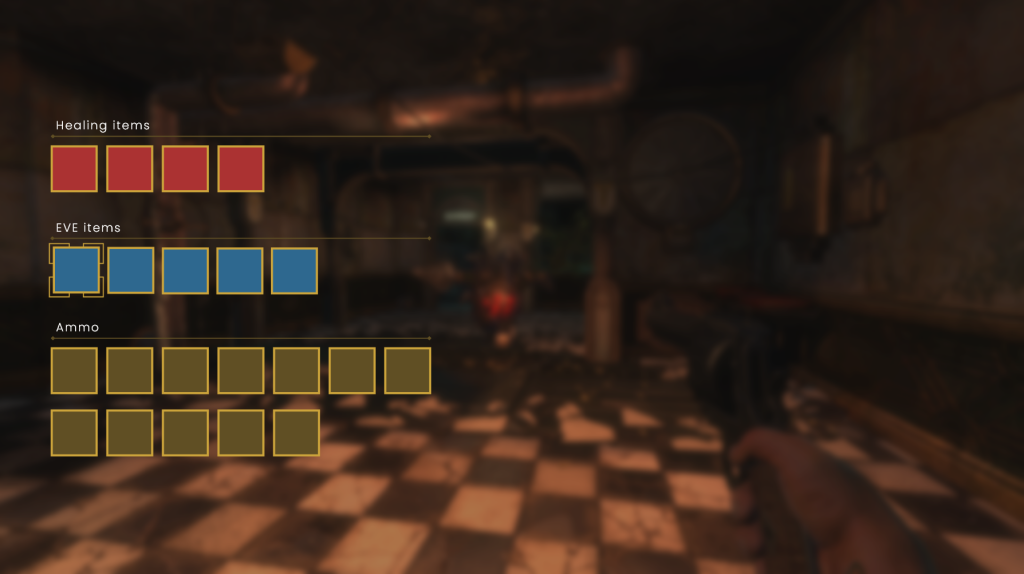
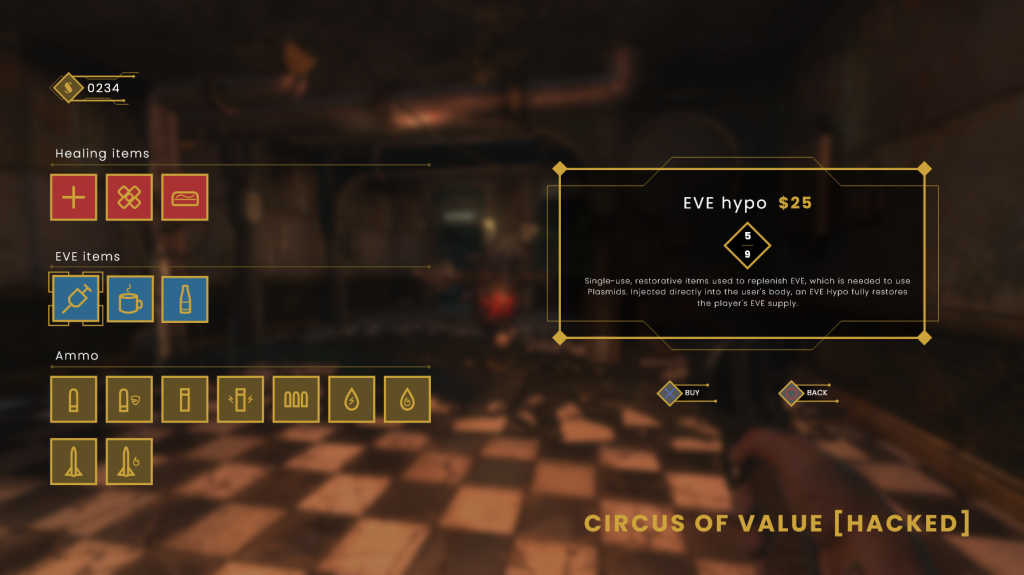
Taking both of these designs into account, I created my own vendor screen. I started by looking at the items generally available to players through in-game vendors and breaking them down into groups. I would argue that there are three groups of items – healing items, EVE replenishing items, and ammo. I intended to arrange my vendor UI around these groups for clarity. I then created three horizontal sections for these groups, with headers above. I experimented with a variety of shapes for the item slots, including diamond shapes and more elaborate line work. In the end, these all proved to get in the way of accessibility and simple squares proved to be the best fit (fig. 4). I created some simple corner borders around one slot to indicate which one the player had selected.
I enjoyed making simple icons for each item type, including bandages, cakes, coffee, soda and different ammunition types (fig. 5). My goal was to flatten and minimalise the original’s item icons to make for a more modern appearance which retains high readability. I am happy with the aesthetic I arrived at.

I then created a dialog box on the right hand side to display more information about the selected item. This box displays the item’s name and price, a brief description of it’s utility, and how many the player currently holds (if applicable). A currency count was added to the top-left (the first place user’s tend to scan from), and button prompts were placed below the dialog box. The name of the current vendor is located in the bottom left of the screen in a large, heavily-weighted font.
Location select
The next area of UI I tackled was the level/location select available to players when using a bathysphere. While an infrequently used screen, the original design is nicely themed to be aesthetically linked to the in-world Rapture Metro system. I wanted my design to be similarly themed in line with a metro system, this time taking the appearance of a rail map (fig. 8), to visually indicate the distance that the player is travelling between locations.

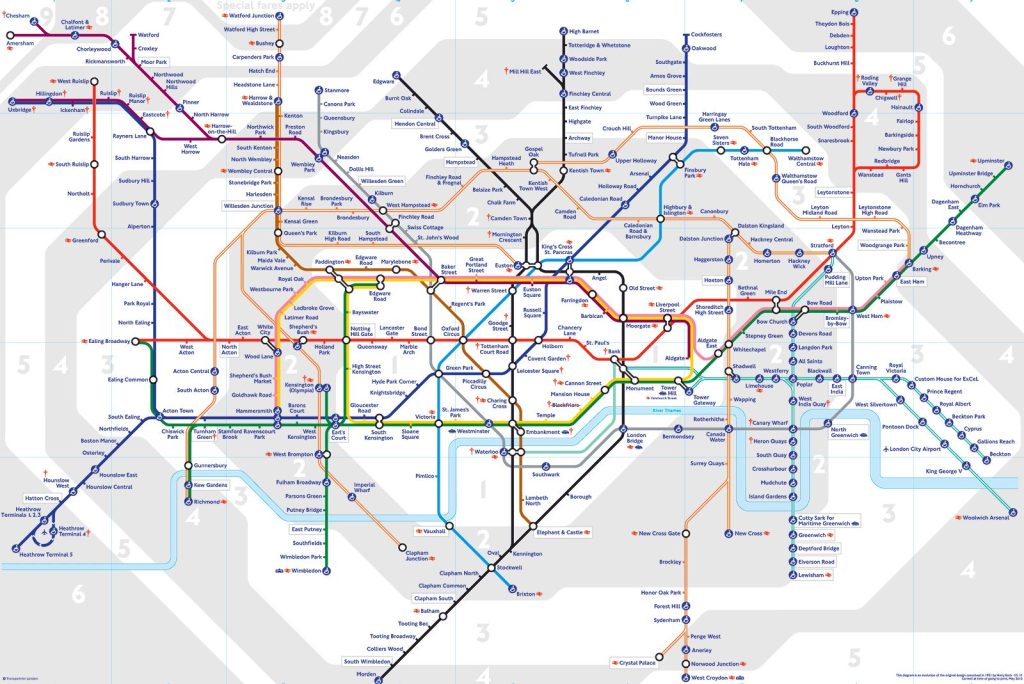
Using the pen tool, I drew an angular path across the screen, moving up and down in 45 degree increments, to represent the main line of the metro system. At regular intervals, I placed a diamond on the path, each one representing one of the eight accessible locations. These were then labelled accordingly, with the currently selected level having a filled-in diamond and fully opaque title. To add some more believability to the rail map, I added some small paths diverging from the main line, to indicate other locations accessible via the metro. Final touches were then added, including a ‘Rapture Metro’ title, a subtitle directing the player to select a destination, and button prompts seen at the bottom (fig. 9).

Research
In an attempt to increase my proficiency with my current toolset, I have started taking an online course on using Adobe XD (Scott 2022). Taught by a professional UI/UX designer, the course goes through the application in great detail, with practical tasks helping to cement the knowledge. The lecturer also takes time to describe how the design process works within a professional context, which has helped me to gain a better understanding of how this form of design works within industry. I am a quarter of the way through the 9.5 hour course and have already learnt some great keyboard shortcuts and less obvious features that have helped improve my workflow. I look forward to delving further into the course, where future lessons promise to cover animation, prototyping, and working in conjunction with other Adobe products.
References
BioShock. 2007. Irrational Games, 2K Games.
Days Gone. 2019. Bend Studio, Sony Interactive Entertainment.
Destiny 2. 2017. Bungie Inc, Activision.
SCOTT, Daniel Walter. 2022. ‘User Experience Design Essentials – Adobe XD UI UX Design’. Udemy [online] Available at: https://www.udemy.com/course/ui-ux-web-design-using-adobe-xd/ [accessed 26 October 2022].
List of figures
Figure 2: 2017. Destiny 2 vendor UI screenshot. Interface in Game [online]. Available at: https://interfaceingame.com/screenshots/destiny-2-faction-reward/.
Figure 3: Jake Green. 2019. Days Gone vendor UI screenshot. USgamer [online]. Available at: https://www.usgamer.net/articles/29-04-2019-days-gone-weapons-best-weapons-weapons-list-can-you-store-weapons
Figure 8: BBC. London Underground Map. Available at: https://www.bbc.co.uk/london/travel/downloads/tube_map.html [accessed 29 October 2022].